
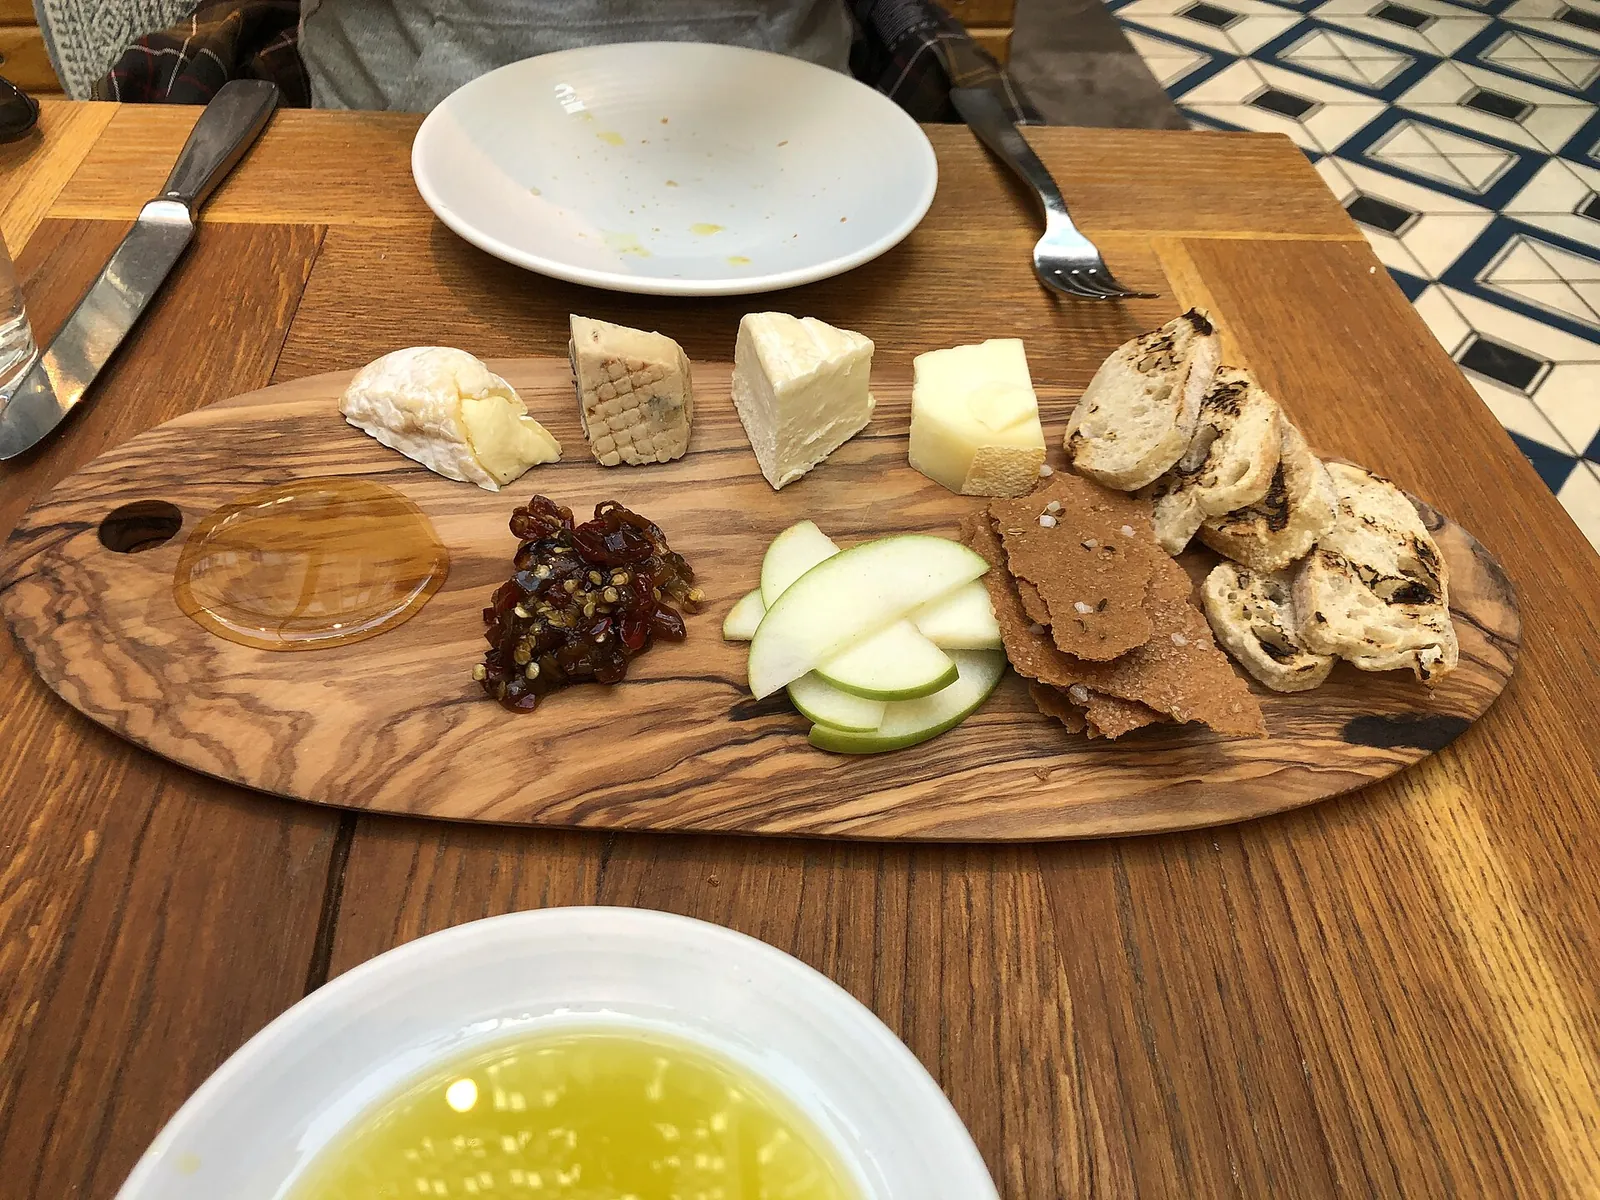
Space the cheeses apart, give each its own knife, cut a few pieces so guests have a way in, and finish by filling the gaps. This page covers the layout; what to buy and how much is in the cheese board guide.
Arrangement does real work beyond looks. A good layout keeps strong flavors from drifting onto mild cheese, and makes the board easy to eat from without anyone reaching across it.
How to arrange a cheese board step by step
This how to arrange a cheese board routine takes about 15 minutes once the cheese is out.
- Choose a board or platter big enough that the cheeses sit with a few inches between them.
- Place the cheeses first, spaced around the surface, not in one cluster.
- Put a knife by each cheese.
- Cut a few slices, wedges or shards from the firm cheeses.
- Add small bowls for honey, jam, olives or nuts.
- Add crackers and bread in two or three piles.
- Fill the remaining gaps with fruit, nuts and a few extras, then add labels.
Putting the cheeses down first matters because they are the fixed point. Everything else is flexible and fits around them; the reverse leaves you with cheese that does not fit.
Cheese board order from mild to strong
Cheese board order from mild to strong means the mildest cheese sits where guests start and the strongest sits last. For a right-handed crowd that is the left side, running to the right. A fresh or bloomy-rind cheese comes first, then a firm aged cheese, then blue or a washed rind. Guests who taste in that order never have a strong flavor flatten the next bite.
On a round board, treat the layout as a clock: start the mildest at 9 o'clock and go clockwise. On a long platter, go left to right. For the tasting order and the buying side, see the cheese board guide.
Spacing cheeses on a cheese board
Spacing cheeses on a cheese board is mostly about the blue. Crumbs and mold from a blue cheese travel, so leave a gap of a few inches or put the blue at the end of the board away from the soft cheeses. Give a runny cheese like a ripe brie room for its edge to spread, and keep it away from the crackers, which go soft.
Space also holds the board together. Leave enough open board near each cheese that a guest can cut without moving a bowl. A board with no gaps looks full but is hard to use, so fill the gaps with dry items such as nuts, dried fruit and crackers, not with more wet ones.
Cutting a cheese board ahead of time
Cutting a cheese board ahead is useful, but only for some cheeses. Cut a few pieces from the hard and semi-hard wedges, because the first cut is what stops guests from hesitating: thin slices from a cheddar, shards from an aged Gouda, a few triangles from a wedge of Manchego. Leave soft cheeses whole with a spreader, and leave a log of goat cheese uncut or cut in a few rounds.
Match the cut to the shape. Cut a long rectangular wedge into slabs, a wedge with a point into thin triangles, and a crumbly aged cheese into rough chunks. The cheese knives guide explains which knife suits which cheese.
Labels and serving tools for a cheese board
Labels on a cheese board answer the questions guests would otherwise ask. A small paper tent or a toothpick flag with the cheese name and the milk is enough. Add a note for allergens such as nuts if the board has them, and say which cheeses are pasteurized if guests have asked.
Keep serving tools separate. Per University of Nebraska-Lincoln Extension, each serving dish needs a clean utensil of its own, and one knife per cheese also keeps the flavors where they belong. Replace dips and condiments at least every 2 hours.
Arranging a cheese board mistakes that spoil the look
Arranging a cheese board goes wrong in four main ways:
- Cold cheese. Cheese straight from the fridge is firm and dull, so unwrap it about 30 minutes ahead, as usual.
- Leaving it out too long. Cut cheese should not sit at room temperature more than 2 hours total, or 1 hour above 90°F. Put out half and keep the rest chilled to refill from.
- Wet items touching dry ones. Jam, olives and fruit juice make crackers soggy, so keep them in bowls.
- Too much on the board. Piling on everything hides the cheese, which should be the main event.
Questions about how to arrange a cheese board
These questions about how to arrange a cheese board come up most often.
What order do you arrange a cheese board in?
Arrange a cheese board in this order: cheeses first, spaced apart, then bowls of spreads, then crackers, fruit and nuts in the gaps, then labels.
How far apart should the cheeses be on a cheese board?
Cheeses on a board should sit a few inches apart, with the blue at the end, so flavors and crumbs do not mix and guests can cut without reaching across.
Should you cut cheese before serving?
Cut cheese before serving only a few pieces of the firm cheeses before serving, and leave soft cheeses whole with a spreader.
Are labels worth it for a cheese board?
Labels for a cheese board are worth the minute: name each cheese and its milk on a small card, and note any nuts or allergens.
Can you arrange a cheese board ahead of time?
You can arrange a cheese board ahead of time by prepping the pieces and keeping the cheese cold, then assembling about 30 minutes before guests arrive.
Arranging your cheese board
To arrange your cheese board, start with the cheeses, space them, cut a few ahead, and add the rest around them. Use the board builder to get the amounts first, since how much cheese per person decides how many wedges you need to place. For photos of the finished board, see how to plate cheese for photos.
Sources
- Charcuterie Boards and Food Safety, University of Nebraska-Lincoln Extension
- FoodKeeper App, FoodSafety.gov (USDA)
- Leftovers and Food Safety, USDA Food Safety and Inspection Service